Powerapps Build tools for Azure Devops CICD
Few months before,I got a task to automate solution deployment process through Powerapps Build tools.
Before doing this , I had no experience in AzureDevops. Hence I am sharing my experience through this blog that may be helpful to non Devops guys who are working in Dynamics365.
Step1:
Create a folder and Solution files in Master branch.


 Select "Generic"
 Mention "Dynamics 365 CE" URL, User name and Password, Make sure that this user has System Admin Security role in Dynamics365.
You can also Set "Service Connection Name" and click on save.


Select "Empty Job"

Give Stage name "QA"

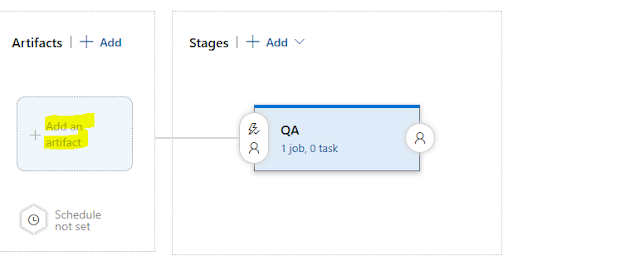
Click on "Add an artifact" as highlighted in below image
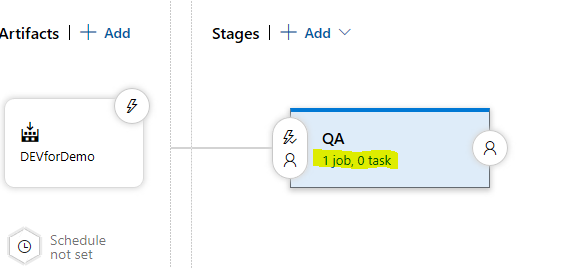
Select a build pipeline that we have created in Step2.

Give a name to artifact and click on add.

Now Click on QA stage "Job" as highlighted in below image.

Click on "+" button as highlighted in below image.

Here we need to import solution that we have exported in Build pipeline.
Here, You have to give QA env URL and solution file from artifact.

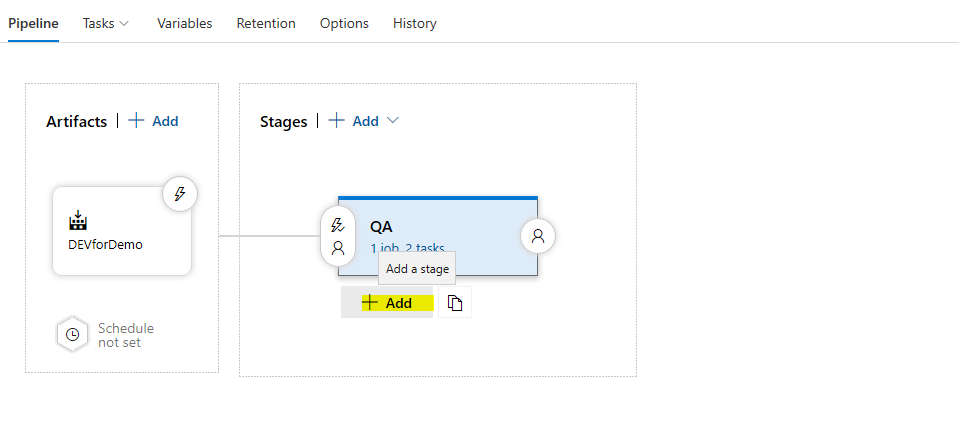
To Add another Stage like "UAT", Click on highlighted button.that is mentioned in below image.

We can also add "Pre deployment conditions" like pre-deployment approvals etc.
To do this, You need to clcik on highlighted button as mentioned in below image.

You can add multiple users whom approval required for UAT deployment.
 Finally Release pipeline will looks similar as below image.
 To execute click on "Create release"

Before doing this , I had no experience in AzureDevops. Hence I am sharing my experience through this blog that may be helpful to non Devops guys who are working in Dynamics365.
Step1:
Create a folder and Solution files in Master branch.


Step 2:
Click on Release then Pipelines and Click on "Create Pipeline"

Then click on "Use classic editor" as highlighted in below image.

Select "Azure Repos Git" and select correct "Team Project", "Repository" and "Branch as Master" then click on continue.

Click on "Empty Job" as mentioned in below image.

As per below image , You can add a task by clicking on highlighted "+" button and search for PowerApps tools and get it or install it.
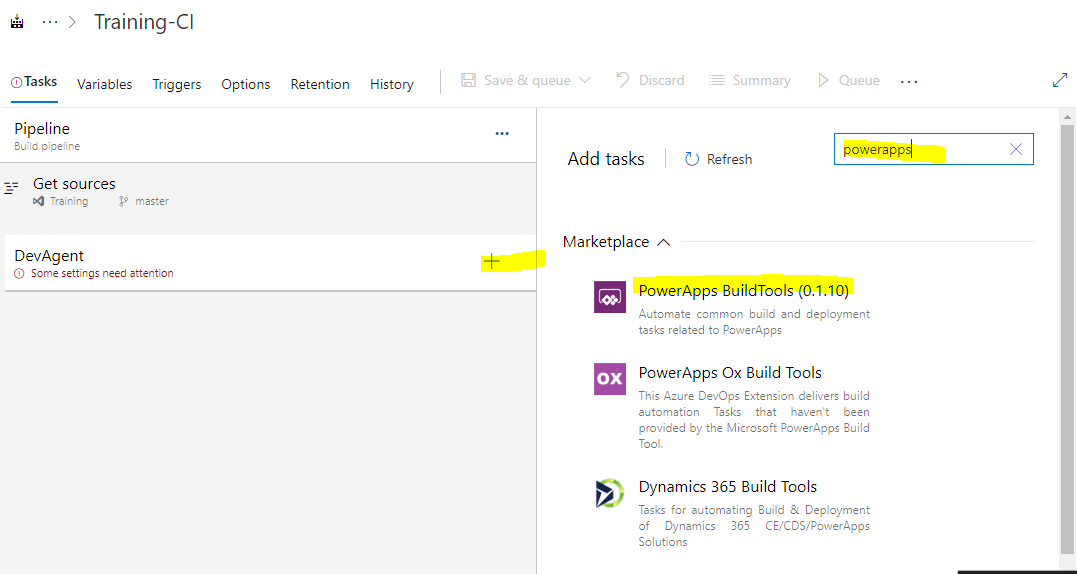
Once you install it then click on "+" button as highlighted in above image and type "Powerapps" then you will get all it's component as shown in below image:

First component should be "Powerapp tool installer" as highlighted in below image. Then you can add other components as I have added "PowerApps Publish Customizations" once you add these components then you have to set "Power App Environmnet URL".To set it click on "Manage" as highlighted in below image.

Click on "Create Service Connection"


You can also Set "Service Connection Name" and click on save.

Now you can use this Service connection name in "Power App Environmnet URL" as mentioned in below image.
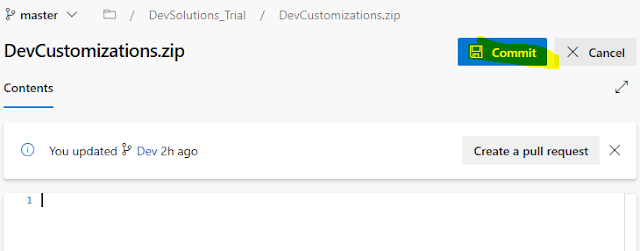
In below Image, I used "PowerApps Export Solution" component, Here I mentioned solution name "DevCustomizations". This is a CRM solution that I need to export from dev and import it in QA.
When ever you give Solution name then make sure that it exists in your Dynamcis365 CE.

In solution output file, Browse file that we have created in Step 1 and click on OK.

Add a "Publish Artifact" and give it a name. This is an important part, that need to be add at end of Build Pipeline.

Click on Save or Save and Queue.

Step 3:
Create release pipeline.
Click on releases then new

Select "Empty Job"

Give Stage name "QA"

Click on "Add an artifact" as highlighted in below image

Select a build pipeline that we have created in Step2.

Give a name to artifact and click on add.

Now Click on QA stage "Job" as highlighted in below image.
Click on "+" button as highlighted in below image.

Here we need to import solution that we have exported in Build pipeline.
Here, You have to give QA env URL and solution file from artifact.

To Add another Stage like "UAT", Click on highlighted button.that is mentioned in below image.
We can also add "Pre deployment conditions" like pre-deployment approvals etc.
To do this, You need to clcik on highlighted button as mentioned in below image.

You can add multiple users whom approval required for UAT deployment.


Every time, You have to execute build pipeline before executing release.
Please comment your questions if you have, I will try to resolve them.
Cheers,
Rocker


Very informative.Only one question is coming in mind that is, will artifact's same for all three stages?
ReplyDeleteYes. Build pipeline artifact will be same in QA, UAT and Prod Stages.
Delete